Showing posts with label stash busting. Show all posts

24 September 2026

Quiltless

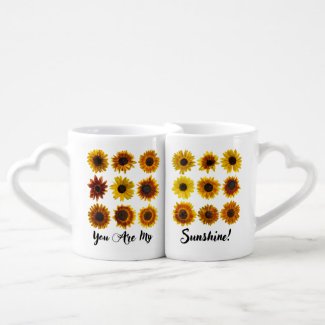
The sunflower quilt was my goal again this week, but here it is, nearly bedtime Wednesday, and I still haven't touched the sewing machine. I've pulled out every sunflower fabric in my stash and Lizard's stash, but no sewing yet.

The layer cake, which I'd totally forgotten buying, is so pretty, I almost think it would make a better top than my Spoonflower panel, and my panel could be the quilt back... Decisions, decisions...

What to do when you can't decide??? Well, gift baskets work up pretty quickly, and I use stash yarn. I'm tickled pink with my Pinktober basket. It was fun to fill with things I'd mostly already made, plus a few curated items.

Now I'm drooling over the color combo of my trending Halloween palette. I really need to dye some crochet thread with these colors!

Linking up with Alycia Quilts.

12 March 2026

Stash Busting


(affiliate links to my designs)

I was looking for a creative way to increase the size of one of my Spoonflower cheater panels when I came across my leftovers from a quilt from the past, also made with Spoonflower cheater panels.

Initially, I'd bought four fat quarters of my individual citrus slice for a project I never wound up doing. When I suddenly became the grandma of many little bundles of joy, I needed to make a bunch of quilts for Christmas fast. I made 15 grandkid quilts that first Christmas and three more the next year. The citrus slice fat quarters were combined to make a much bigger quilt than a printed yard of Spoonflower cotton alone. I liked the pieced panel so much, I made another cheater panel combining the four images into one.

I had been looking for sunflower quilt border ideas for inspiration when I realized I probably have quite a few leftover yellows in my stash. I didn't immediately remember the reason I had so many yellows, but I undertook the equivalent of dumpster digging in my solids bin and found much better than hoped for. I'm thinking some kind of piano key border might just be perfect for using up scraps AND making an awesome and unique border.

I think I initially planned to use some rows from my Spoonflower sunflower yardage to extend the length and width of the panel. I then considered using the yardage as the back of the quilt. But somewhere in my stash exists a bunch of sunflower fabric Lizard had at one point intended to use to make quilts for his Etsy shop. I still hope he will one day quilt again, but for now, it would be okay to use up elements from his stash if he has sunflower fabrics that might work well with this project. Might even be inspirational just to peruse his stash...

In the meantime, digging around in the stash turned up another fleece cheater panel I created at least a couple of years ago. I'd forgotten all about it!!! I'm so excited to crochet an edging on this baby and add it to my Etsy shop!!!

29 August 2024

Two Months and Counting

My goal was to have two-month-old Melody's quilt in the mail by Monday. Last Monday. Actually, July 8. But life happens. I guess my revised goal is next Tuesday...

When I made the initial dozen blocks, I nixed using the blacks and grays in the Sweet and Plenty colorway. I didn't think they looked girly or babyish.

The quilt needed to be bigger, and I didn't like the options I had with the remainders of my jelly roll. I didn't have enough of any stash pink solid I could use as sashing. And I didn't want to buy more fabric. After playing with the blacks, I decided they actually add a little punch to an already cute quilt.

I'd planned to use the pinks, limes, aquas and whites of the remaining jelly roll strips to make the plain Jane back big enough. I didn't have two of anything but the grays. So I played around with the sashing, and I decided the gray in the colorway looks just as good as the black. Funny how different fabrics can twist and turn in your design when you're trying to use what you have instead of acquiring more!

Quilting has begun! Plain and simple with the domestic machine because Ringo hasn't been touched in a couple of years and probably needs routine maintenance. When the quilting is done, I get to repeat this whole color adventure all over again as I try to decide what fabric color/pattern I should use for binding...

07 March 2024

Snowflakes Galore

My first quilt finish since October 2022 is in the mail en route to recipient Baby Evelyn!

Because there's not enough time left to make a quilt for my boss who is getting hitched this weekend, the newlyweds are receiving a stash lap quilt I finished back in 2022. It features two of my first Spoonflower snowflake temperature quilt panels, way back before I really knew what I was doing in creating digital temperature quilt panels from existing photographic images. I definitely love the cool side better than the warm side, but I think back to back, the two months contrast beautifully. I think my boss, who has always been a fan of my fiber creations, might enjoy it.

I cut rows off the December and November yardage of my 2023 digital snowflake temperature quilt yardage to create the border for Evelyn's quilt. I had designed the Spoonflower fabric to be cheater panels for puff quilts, but I found out the hard way puff quilts take a LOT of work. My January/February sampler is going to be awesome when I finish it, but the remainder to be quilted it too big to push through my little domestic sewing machine, and I don't really want to try to do it with the longarm. Which means I'll probably end up doing it by hand. No worries; I can do it. I just have to do it. Maybe now that I have my first two 2024 deadlines out of the way, I can get some work done on this project and get an idea of how long it might take to complete it by hand.

I have ten more yards of 2023 panels. All of them were 9 rows by 8 rows. The two I cut up to finish Evelyn's quilt are now 6 rows by 6 rows, which I thought might work great as a very large quilt. So now I've cut up the other ten yards to match. Sewn together, all 12 would make a GREAT puff quilt, but I don't know that I want to put that much time into it. I can do a regular quilt without the puffs, and although I'd have to keep reloading it only my baby quilt-sized Sweet Sixteen (which I affectionately call Ringo), it would still take a while. I've got time to think about it, so the panels are stacked in order by month until I decide what to do with them. Meanwhile, I've got plenty of snowflake strips now from the trimmings I will be able to use in countless projects. Perhaps another baby quilt, but also, maybe the blue squares can become part of the backing for my Moda Blockheads II quilt...

08 September 2022

Mending without Spending

I need to cheer three times because I finished three projects during the three-day weekend! All three are from my mending pile instead of my WIP list, but I'm making progress, slow but steady, in finishing things that have needed to be done, some for a decade or more.

First up was a very short stack of various batik layer cake leftovers I thought could make a good quilt or quilt back in a bind. This stack has been on my sewing table (which sometimes doubles as a dining room table, ha ha) for at least a couple of years. My mending pile has sojourned right next to these layer cake remnants, so I've always considered the blocks part of the mending pile. The scrappy layer cake has grown a bit in the last two years until it finally contained 12 blocks, which is my own definition of perfect for a kid quilt layout.

Somewhere along the line, I bought a half-price jelly roll, thinking that would make perfect sashing for this leftovers project. When I finally sat down to work out a layout, I found I wasn't very happy with two of the 10-inch squares, and I found out why the jelly roll was on sale. I didn't like it too much at all.

I ended up cutting out three more 10-inch blocks from my batik stash, then incorporating leftover batik strips I cut myself back when I was designing batik jelly roll quilts for my grands. I also threw in a few blocks from a sale charm pack I picked up who knows how long ago. I LOVED the charm pack, but there were only 24 blocks, so not really enough to make a quilt. Using the squares in this project helped me feel like at least one sale precut I bought was worth the price!

I'm thinking this might be an excellent quilt backing. It could be a quilt front, too, but I promised I would not create any new quilts until I finish a few more WIPs. I can even make this flimsy bigger by adding more of my home-cut batik strip leftovers around the edges if I need to, perhaps even creating a fancy border.

Next up is the dress I intended to wear to my niece Lyndsie's wedding. Back in 2016!!! Lyndsie actually gave birth to her second son last week, and I have a pretty nice little stash of finished kid quilts now, so I was able to get one off in the mail the day after my new grand nephew arrived instead of spending the three-day weekend making another baby quilt.

I bought this border-edged rayon batik even further back than Lyndsie's wedding, perhaps in 2010, at the now-defunct Denver National Quilt Festival. Oh, how I fell in love with the fabric!!! Total impulse purchase! I bought three yards, because it was wide, thinking that would be enough for a dress. I finally began the dress perhaps a month prior to Lyndsie's wedding... I typically can finish most dresses in one day. But no, not this one... I did not have enough fabric for both the bodice top and back.

I can't remember how long it took me to find a nearly matching rayon batik so long after I bought that original fabric. I do remember I didn't find it in time for the wedding. So I had to wear something else on that special day.

What I bought doesn't truly match, so I ended up cutting both bodice parts from the additional fabric (and sending the original bodice piece to the scrap stash), hoping the dress wouldn't look too bad with the top of the dress made from a different fabric than the bottom.

I can't remember why I didn't put the top and bottom together when I finished cutting them out, but it's possible the timing coincided with 15 quilts for my new grandkids for Christmas! A very worthy distraction! Oh, and in looking up that significant event, I discovered that's also the time period when my 34-year-old beloved Viking Husqvarna finally gave up the ghost. I distinctly remember that unfortunate event putting all kinds of delays into all quilting, sewing and mending projects. The dress got buried by one more mending project after another, until I couldn't even see what was on the bottom of the stack and until I bought a new, very inexpensive sewing machine, a Brother Project Runway (approximately three years ago). Last weekend I began deconstructing the mending pile to discover why it had grown so tall and what secrets it held.

I thought perhaps I may have procrastinated finishing the dress because facings are not my favorite thing to do, particularly when I blind-stitch tack them down by hand. I don't remember even putting the top of this dress together, but, lo and behold, I did. I also don't remember crocheting (and installing) the loop I planned to use for the back button, which I no longer have (at least in a location I might think to look). Thankfully, my button stash included a suitable button that fit the crocheted loop, and half an hour later, my dress was done!

Last but not least, the mending pile included two pairs of bike shorts. One needs a new chamois. Cheaper than buying a new pair of cycling shorts. But doing a project like that by hand (which is how I began... 15 years ago!!!), obviously convinced me I'd be better off buying a new pair of spandex shorts. The second pair of bike shorts in the stack needed the chamois tacked to the shorts because each washing resulted in serious slippage and very uncomfortable rides. I tried my hand at this pair using my sewing machine and learned why the first pair of shorts was being done by hand. Those chamois pads are not the easiest things to sew, by hand OR by machine!!! Nevertheless, my stash of cycling shorts now is one pair richer without a single dime being spent.

Linking up with Alycia Quilts.

21 October 2021

Lessons

My mother-in-law had to buy a new sewing machine last year during the height of the pandemic. Like me, before I had to buy a new domestic, she'd been using a 30-year-old machine, but only for mending and denim rag quilts. Like me the first time I get any new sewing or quilting machine, she was hesitant to test-drive her new Brother. Both of us longed to be able to spend time together, and not just to visit after such a long absence. She was hoping I could help her become more acquainted with her new machine, which is a pretty decent upgrade from my now three- or four-year-old Brother.

We recently spent a week together doing almost nothing but staying home (although Lizard and I did walk and ride in the neighborhood every day) and enjoying the peace and quiet that sometimes seems fleeting at my house now that I'm working from home. It was my first non-medical time off in nearly two years (except for a similar visit back in May that turned out to be funeral planning and attending, rather than any kind of relaxation). I had no idea how much I needed a break from work and medical appointments. Now I'm excited for the next time I get to take some time off and do nothing. Who knew there is life outside of being a weekend warrior after a tough family diagnosis?!?

First up was showing Lizard's mom how to thread the machine and wind bobbins. I've been telling her for a year now I would teach her to quilt. A walking foot came with her machine! I have not purchased one for mine yet. But I bought a longarm right around the same time as Lizard's Parkinson's diagnosis, hoping quilting might be good therapy for him, as well as a super enjoyable pastime for me. So I can't give walking foot lessons yet. I do still FMQ on my Brother once in a while, but I'm trying to do most of my quilting on the longarm these days so I can gain proficiency.

My mother-in-law convinced us to visit a quilt shop in her home town, and boy, was that dangerous! But not because of any germs! It had been so long since I'd been able to see so much fabric in one place. My budget was in peril for at least half an hour! I ended up buying two charm packs so I could show my mother-in-law disappearing four-patch and disappearing nine-patch piecing as a beginner project.

Now I'm going to have to keep an eye out for a good charm pack (or layer cake...) sale with fabric she might enjoy. I think she'll eventually try the method with denim because she seemed fascinated by all the many options. I think she will have a lot of fun if I can find just the right cotton prints.

Initially, I thought this Snow What Fun charm pack might become the back for a WIP at my house. Once I started playing with blocks, my mother-in-law decided they would become the perfect baby quilt for her neighbor's newborn premie twins. Initially, my mother-in-law thought perhaps she might be able to make a pair of quilts for the babies once I finished piecing these blocks. But then she decided she'd rather have me finish two giftable baby quilts for her while she learns the basics on her machine. Now I just have to figure out what to make for the other twin.

I had to add some of my own blue snowflake stash at home to make the different-sized blocks fit together and to make the quilt top big enough. I ordered a yard of the cute dark blue penguin and polar bear print for the back, and it finally arrived yesterday. So I hope to have this half of the twin project finished next week!

Linking up with Alycia Quilts and Confessions of a Fabric Addict.

12 October 2021

WIP it Good

I vowed last month to participate in the Devoted Quilter's 100-day WIP challenge. I've been participating in a Ravelry quilt WIP challenge for years, and sometimes I've even successfully completed quilts on my list. Many summers, however, have passed without fnishing a single thing.

I also participated for several years in Ravelry's Starfleet Academy, which also had regular WIP challenges. I was much more successful in meeting those goals, possibly because the crafts I was trying to finish were smaller than quilts, and I typically had to finish just one each month. The real challenge was tying my finishes into the monthly outer space themes...

I still have stacks of projects hidden in every nook and cranny, crying out to be finished. I'm excited to start searching for them and to hopefully start whacking a few of them into the light of day and more appropriate lifestyles. Finished lifestyles. Giftable lifestyles. Useful lifestyles. Anything but hiding in a brown paper bag beneath the bed or in the corner of a closet!!!

I didn't have to hunt far and wide for one of my first finishes. This flimsy basket has been in my crochet project bag for at least three years. I'd set a goal back when I whipped up this "Flower Girl Basket", literally in about two train commutes, to use up some of my hand-dyed thread so I could justify dyeing more. It's funny to remember now that back then, I wanted to make similar baskets from each of the six colors of the rainbow. I'm not sure I've touched my hand-dyed thread since I finished the handle of this basket.

I also didn't have to look far to find the single-serving cereal cup I'd used to shape my previous baskets. It was in the basement, in a box of unfinished snowflakes I've wanted to bring upstairs for several years now. Gosh, since perhaps 2013!!! That's when I wrote the basket pattern!!!

The Honey Nut Cheerios container had a surprise for me, though. I did not remember that I had another unfinished another basket from the same pattern. This one is not my hand-dyed thread. It's Lizbeth, which I collected quite a stash of back before I became addicted to thread-dyeing.

If I finished the basket handle to go with the unexpected WIP, I didn't put it in the same box. I had to make another one. I searched my old Lizbeth stash to see if I even had any more of that pink and purple thread.

Turning to the stash was not a pleasant task. I've long avoided organizing my Lizbeth thread. Lizard has accidentally knocked down a ball or two from time to time, as have I, and the unraveled messes often got tossed back onto the pile. The stash literally was a tangled mess. A tangled mess I wasn't using anymore, so why bother, right???

I'm probably going to have to dive into that stash to finish more of the WIPs lurking in that crochet box from the basement. So I might as well clean it up before I get started.

The variegated threads look so much better now! I didn't organize the solid colors yet. I'll try to do that in conjuction with my next crochet WIP. Maybe. Thankfully, I did have a tiny bit of the Girly Girl thread left, so I set right to work making a handle for the Girly Girl basket.

Both handles had to be stiffened, and then I got side-tracked by work and by a Boss Day project I needed to finish in time to mail. Oh, and a couple of baby quilts... But that's another WIP story.

The blue basket had to be stiffened, too. I apparently crocheted tighter three years ago than I did back in 2013. The blue basket wouldn't fit over the Cheerios container. I ended up using a regular plastic drinking cup, which was square on the bottom. Before I set the school glue-covered basket aside to dry, I twisted it around on the cup, and that evented out the corners the cup formed. Now dry (and finished), the blue basket gives no clue it was dryed on a square-bottom form.

Finally, I got to sit down and finish my baskets. I wove a ribbon through each handle, then stitched the handle ends in place. I don't know yet what I will do with the baskets. But they are done, and that feels so blasted awesome!!!

Related Posts with Thumbnails