

What a drag to be sick on a three-day weekend!
Typically we'd be cross country skiing on the Grand Mesa or at Crested Butte, which received a total of 90 inches of snow during winter storms Helena, Iras and Jupiter!!! Unfortunately, The Lizard had to work, and we generously shared the timely cold to boot.

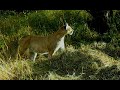
Winter Storm Iris Snowflake in real winter storm Jupiter snowflakes!
The office where I work also asked employees to focus on service on our Martin Luther King holiday instead of skiing. I had been trying to come up with a way to serve and yet still be able to go cross-country skiing until I found out my husband would working the entire weekend, all three days.
Now I'm planning a service project today, provided my head cold has abandoned ship, and I hope to report on that in the next week or so.
I guess I come up with some of my best ideas when I'm cranking out the midnight oil. The building where I work is having a tenant art show, and submissions are due tomorrow. I came up with the coolest idea last Thursday, but being under the weather prevented me from moving into deadline mode. I do have a couple of other things I was hoping to submit, and I'll report on those (and share photos!) if they are accepted.
As for the special project, perhaps I'll finish it in time for Snowflake Day on February 6. Hey, that's a Monday! Wouldn't it be a perfect Snowflake Monday blog post?
If I can get it done on time...
And last but not least, I also planned to finish up Remington's baby quilt before my newest nephew arrived. Totally missed the deadline. I thought I had until the 15th, which wouldn't have been doable with the head cold and sinus issues, however, I also had to teach (last time, unless they invite me back again) on Tuesday night last week, and I had to get ready for class on Monday night, so I didn't get any quilting done those two nights. (And it was head cold city after that.)

Remington Jasper LeBeaux was born Friday the 13th, same as me too many years ago! His mom, my niece, Lindsay, sent us the most incredible painting for Christmas. We had it professionally framed and matted, and we picked it up on Friday the 13th! It proudly hangs in our living room. Isn't it awesome?!?

Lindsay's pseudonym or art name is Iris Ink. The name Iras used in the 2017 winter storm list comes from Shakespeare's tragedy, "Antony and Cleopatra." I changed up the spelling for this week's flake because I like the name and the symbolism better.
You may do whatever you'd like with snowflakes you make from this pattern, but you may not sell or republish the pattern. Thanks, and enjoy!

Finished Size: 6-6.5 inches from point to point
Materials: Size 10 crochet thread, size 7 crochet hook, 1.25-inch button (yes, it should work with other sizes with minimal adjustments, but do make sure the buttonholes are big enough for the crochet hook to fit through multiple times), empty pizza box, wax paper or plastic wrap, cellophane tape, water soluble school glue or desired stiffener, water, glitter, small container for glue/water mixture, paintbrush, stick pins that won't be used later for sewing, clear thread or fishing line
Winter Storm Iris Snowflake Instructions
Round 1: 1 dc in button hole, ch 3, 1 dc in 3rd ch from hook, ch 4, 1 dc in 3rd ch from hook,[1 dc in same buttonhole, ch 3, 1 dc in 3rd ch from hook, ch 4, 1 dc in 3rd ch from hook] 2 times, 1 dc in next buttonhole, [ch 3, 1 dc in 3rd ch from hook, ch 4, 1 dc in 3rd ch from hook, 1 dc in same buttonhole] 2 times; ch 3, 1 dc in 3rd ch from hook, ch 4, 1 dc in 3rd ch from hook, sl st in starting dc.
Round 2: Ch 8 (counts as 1 tr and ch 5), * sk next dc picot, 1 dtr in next ch, ch 5, 1 dtr in same ch, ch 5, sk next dc picot, 1 tr in next dc, ch 3, 1 tr in same dc; repeat from * around 5 times, omitting last tr and last ch 3 of final repeat; ch 1, 1 dc in 3rd ch of starting ch 8 to form 6th ch 3 tip of Round.
If you're not reading this pattern on Snowcatcher, you're not reading the designer's blog. Please go here to see the original.
Round 3: Ch 2 (counts as 1 dc), 2 dc over post of dc directly below, 1 sc in next ch 5 sp, 6 dc in next ch 5 sp, ch 5, 6 dc in same sp, 1 sc in next ch 5 sp, 3 dc in next ch 3 tip, ch 7, sl st in 2nd ch from hook and in each of next 4 ch, ch 6, sl st in 2nd ch from hook and in each of next 3 ch, ch 5, sl st in 2nd ch from hook and in each of next 2 ch, ch 6, 1 dc in 4th ch from hook, 1 hdc in next ch, 1 sc in next ch, working back down branch, ch 4, sl st in 2nd ch from hook and in each of next 2 ch, sl st in ch between 3 sl st spike and 4 sl st spike on opposite side of branch, ch 5, sl st in 2nd ch from hook and in each of next 3 ch, sl st in ch between 4 sl st spike and 5 sl st spike on opposite side of branch, ch 6, sl st in 2nd ch from hook and in each of next 4 ch, sl st in next ch after 5 sl st spike on opposite side of branch, 3 dc in same ch 3 tip; repeat from * around 5 times, omitting last 3 dc of final repeat; sl st in 2nd ch of starting ch 2; bind off. Weave in ends.
Of course, this snowflake may be made without a button. You may use your favorite snowflake center, or work up this adaption to make a gorgeous picture frame, so suitable for brand new nephews!

Winter Storm Iris Snowflake Frame Instructions
Foundation Round: [Ch 4, 2 dc in 3rd ch from hook (dc picot made)] 12 times. Taking care not to twist work, sl st in starting ch to form ring.
Round 1: Ch 8 (counts as 1 tr and ch 5), * sk next dc picot, 1 dtr in next ch, ch 5, 1 dtr in same ch, ch 5, sk next dc picot, 1 tr in next ch, ch 3, 1 tr in same sc; repeat from * around 5 times, omitting last tr and last ch 3 of final repeat; ch 1, 1 dc in sl st to form 6th ch 3 tip of Round.
If you're not reading this pattern on Snowcatcher, you're not reading the designer's blog. Please go here to see the original.
Round 2: Ch 2 (counts as 1 dc), 2 dc over post of dc directly below, 1 sc in next ch 5 sp, 6 dc in next ch 5 sp, ch 5, 6 dc in same sp, 1 sc in next ch 5 sp, 3 dc in next ch 3 tip, ch 7, sl st in 2nd ch from hook and in each of next 4 ch, ch 6, sl st in 2nd ch from hook and in each of next 3 ch, ch 5, sl st in 2nd ch from hook and in each of next 2 ch, ch 6, 1 dc in 4th ch from hook, 1 hdc in next ch, 1 sc in next ch, working back down branch, ch 4, sl st in 2nd ch from hook and in each of next 2 ch, sl st in ch between 3 sl st spike and 4 sl st spike on opposite side of branch, ch 5, sl st in 2nd ch from hook and in each of next 3 ch, sl st in ch between 4 sl st spike and 5 sl st spike on opposite side of branch, ch 6, sl st in 2nd ch from hook and in each of next 4 ch, sl st in next ch after 5 sl st spike on opposite side of branch, 3 dc in same ch 3 tip; repeat from * around 5 times, omitting last 3 dc of final repeat; sl st in 2nd ch of starting ch 2; bind off. Weave in ends.
Finish: Tape wax paper or plastic wrap to top of empty pizza box. Pin snowflake to box on top of wax paper or plastic wrap.
If using glue, mix a few drops of water with a teaspoon of glue in small washable container. Paint snowflake with glue mixture or desired stiffener. Sprinkle lightly with glitter. Wash paintbrush and container thoroughly. Allow snowflake to dry at least 24 hours. Remove pins. Gently peel snowflake from wax paper or plastic wrap. Attach 10-inch clear thread to one spoke, weaving in end. Wrap fishing line around tree branch (or tape to ceiling or any overhead surface) and watch snowflake twirl freely whenever you walk by! Snowflake also may be taped to window or tied to doorknob or cabinet handle.
I reversed the snowflake tips on this frame, just for the fun of it.


That is awesome to hang at your bay indeed. Blah to working all weekend and the germs though. Hopefully away 1 of 2 shall go and not the one that brings dough.
ReplyDeleteEven better to hang at home when the ground has a fresh new, gorgeous white blanket, Pat! Now if only I felt good enough to do some super macro photography...
Delete