11 December 2017

Snowflake Monday


About five years ago, one of my co-workers on a different floor began a tradition by decorating her entire floor for Christmas. Her imagination and creativity sparked such positive feedback, she now decorates here entire floor for every season of the year. It's really fun to take a tour whenever I need to take a quick break from deadlines!

Deck the Halls


My co-worker's decorations inspired other floors to decorate.


One of the newer bosses in my department was inspired to spruce up our own floor last year. She now hosts a door-decorating party after work the first Friday of December each year.

I don't have a door anymore, but I sit (or stand... I have a standing desk, which also has started somewhat of a fad within the office) near a copy room, a storage room and an empty office, all three of which have doors. I also have two bosses who work outside the office so often, they don't get to participate in decorating. So I decorate five doors.

This year, because I've been so busy, I decided to decorate with my crocheted snowflakes leftover from craft fairs of Christmas Past.


One of my absent bosses had a special request for me. He asked if I would decorate his door with a nativity.


My annual craft fair at the office is this Friday. After I got my decorations up, some of me co-workers began stopping by my desk to buy snowflakes “before they sell out.” They knew I hadn't made many snowflakes this year because I couldn't crochet for about four months. My last week has been spent making new snowflakes to replace the sold ones, plus a couple of special orders.

I typically do not take special orders at the craft fair because I want to spend the final two weeks before Christmas concentrating on my own family. A couple of co-workers had requests I couldn't turn down, and there was still time, so I accepted the special orders.

One has a friend whose partner died of cancer a couple of months ago. Her friend's partner loved dragonflies. My co-worker asked if I could make a rainbow Dragonfly Snowflake after she saw all my individual dragonflies. She wanted one that looks just like the photo...


I told her it would have about 48 knots. I asked if she would like a white snowflake with a rainbow of dragonflies attached. She said to go for it.

Here it is!

You may do whatever you'd like with snowflakes you make from this pattern, but you may not sell or republish the pattern. Thanks, and enjoy!


Finished Size: 6 inches from point to point with Dragonflies; 3.5 inches from point to point with Hearts
Materials: Size 10 crochet thread, size 7 crochet hook, 6 crocheted motifs such as hearts, dragonflies, flowers or even miniature snowflakes, empty pizza box, wax paper or plastic wrap, cellophane tape, water soluble school glue or desired stiffener, water, glitter, small container for glue/water mixture, paintbrush, stick pins that won't be used later for sewing, clear thread or fishing line

Dragonfly Motif
Heart Motif
Daisy Motif
Snowflake Motif

Medallion V Snowflake Instructions

Make magic ring.

Round 1: Ch 2 (counts as 1 dc), 4 dc in ring, take loop off hook, insert hook through 2nd ch of starting ch 2 and replace loop on hook, pull loop through ch (popcorn stitch made), * ch 10, * 5 dc in ring, take loop off hook, insert hook through top loop of 1st dc and replace loop on hook, pull loop through top of 1st dc (popcorn stitch made); repeat from * 5 times, omitting last popcorn st of final repeat; sl st in top of starting popcorn. Pull magic circle tight.
If you're not reading this pattern on Snowcatcher, you're not reading the designer's blog. Please go here to see the original.

Round 2: * in next ch 10 sp work 2 sc, 2 hdc, 2 dc, ch 1, sl st in crochet motif, ch 1, 2 dc, 2 hdc, 2 sc; repeat from * around 5 times, bind off. Weave in ends.

Finish: Tape wax paper or plastic wrap to top of empty pizza box. Pin snowflake to box on top of wax paper or plastic wrap.

If using glue, mix a few drops of water with a teaspoon of glue in small washable container. Paint snowflake with glue mixture or desired stiffener. Sprinkle lightly with glitter. Wash paintbrush and container thoroughly. Allow snowflake to dry at least 24 hours. Remove pins. Gently peel snowflake from wax paper or plastic wrap. Attach 10-inch clear thread to one spoke, weaving in end. Wrap fishing line around tree branch (or tape to ceiling or any overhead surface) and watch snowflake twirl freely whenever you walk by! Snowflake also may be taped to window or tied to doorknob or cabinet handle.

07 December 2017

Space, the Final Frontier...


... and nearly the final quilt!!!

I've finished 14 of 15! The goal is almost as good as done, and I am one happy camping quilter!


Initially, I'd planned to quilt this one with spiral galaxies, but when I loaded the glow-in-the-dark thread, I realized the spool was going to give me some heartache, so I chickened out and did straight lines. Again.


I filled six bobbins, using my fingers to hold the wide-mouthed spool, then used bobbins on both the top and bottom during the quilting process.


I think this quilt's recipient is going to be one of the happiest of the 15 kiddos on my Christmas list! Perhaps I should have used glow-in-the-dark thread for all the quilts!!!


The scariest part of this project was washing the quilt. I wasn't sure the glow would hold. It did. Just one more reason I'm a super happy camper!


One more to go before Christmas! Then I get to make something for me!


Linking up with Busy Hands Quilts, Crazy Mom Quilts and Confessions of a Fabric Addict.

05 December 2017

I Saw Red


One of the reasons I chose November for my sunrise-a-day challenge is because we always seem to get the best sunrises of the year in the eleventh month. Partially as a result of low sun angle, the clouds, when not totally overcast, can be heavily bejeweled by our jet stream and pre-winter weather patterns.

I sought red, and I found no shortage, morning or evening!


04 December 2017

Snowflake Monday


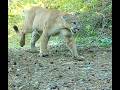
Lizard and I took a marvelous hike the other day on a trail called Coyote Song. Isn't that a magnificent name?!?


But before I share instructions, have you seen the adorable crocheted doors on Drops' annual Christmas pattern calendar?!? Wouldn't this be a cool project with snowflakes?!? Either as doors or as patterns behind the doors? Man, my imagination is just absolutely churning!!!

Oh, one more interruption! As I was trying to work through the instructions below to make sure they are at least a little comprehensive, guess who joined me for breakfast?!?


You may do whatever you'd like with snowflakes you make from this pattern, but you may not sell or republish the pattern. Thanks, and enjoy!


Finished Size: 5.5 inches from point to point
Materials: Size 10 crochet thread, size 7 crochet hook, empty pizza box, wax paper or plastic wrap, cellophane tape, water soluble school glue or desired stiffener, water, glitter, small container for glue/water mixture, paintbrush, stick pins that won't be used later for sewing, clear thread or fishing line

NOTE: The coyote is rather complicated (and worked slightly differently at the end in the snowflake), so I've broken out the instructions for just the coyote and suggest making one first before attempting the snowflake because the instructions probably will be very difficult to follow.


Individual Coyote Instructions

Ch 10, sl st in 3rd ch from hook, 1 sc in next ch, 1 hdc in next ch, 1 dc in each of next 3 ch, 1 hdc in next ch, 1 sc in next ch (bushy tail made),
If you're not reading this pattern on Snowcatcher, you're not reading the designer's blog. Please go here to see the original.

ch 16, 1 sc in 3rd ch from hook, 1 dc in each of next 2 ch (ear made), ch 7, sl st in 3rd ch from hook, 1 sc in next ch (snout made), ch 4, sl st in 3rd ch from hook, sl st in next ch (bottom of mouth made),

draw up loop through 2nd sc of snout to make linked dc, draw up loop through next ch, yo and draw through 2 loops on hook, [yo and draw up loop through next ch, yo and draw through 2 loops on hook] 2 times, yo and draw through all 4 loops on hook (dc dec and coyote head made),


work another dc dec in top and bottom of 2nd ear dc and next ch, 2 dc in same ch as 3rd dc of dc dec just made (throat shaped),


1 hdc and 1 dc in next ch, [yo 2 times and draw up loop through next ch, yo and draw through 2 loops on hook 2 times] 3 times, yo and draw through all 4 loops on hook (tr dec made),


1 tr in each of next 2 ch, yo 2 times and draw up loop through next ch, yo and draw through 2 loops on hook 2 times, [yo and draw up loop through next ch, yo and draw through 2 loops on hook] 3 times, yo and draw through all 5 loops on hook ( tr/dc dec made and body shaped),

ch 3, turn, sk next ch, 1 sc in each of next 2 ch (foot made),

sk next tr/dc dec, 1 sc in each of next 2 tr, draw up loop in next tr dec, yo 2 times and draw up loop through next dc dec, yo and draw through 2 loops on hook 2 times, yo and draw through 3 loops on hook (sc/tr dec made, chest shaped),


draw up loop through top of sc/tr dec just made, yo and draw through both loops on hook (foundation sc made), 4 fsc (front legs made); bind off. Weave in ends.


Crescent Moon Instructions

Ch 20, 1 sc dec in 4th and 5th ch from hook, 1 sc dec in next 2 ch, [1 dc dec in next 2 ch] 3 times, 1 sc dec in each of next 2 ch, sk next ch, sl st in next ch; bind off. Weave in ends.

NOTE: Individual coyote and moon do not necessarily need to be stiffened, but stiffening will keep them from curling.


Coyote Song Snowflake Instructions

Make magic ring.

Round 1: Ch 2 (counts as 1 dc), 4 dc in ring, take loop off hook, insert hook through 2nd ch of starting ch 2 and replace loop on hook, pull loop through ch (popcorn stitch made), ch 3, * 5 dc in ring, take loop off hook, insert hook through top loop of 1st dc and replace loop on hook, pull loop through top of 1st dc (popcorn stitch made), ch 3; repeat from * 4 times, omitting last ch 3 of final repeat; ch 1, 1 dc in top of starting popcorn to form 6th ch 3 sp of Round. Pull magic circle tight.

Round 2: Ch 2 (counts as 1 dc), * 1 dc in next ch 3 sp, ch 5, 1 dc in same sp; repeat from * around 4 times; 1 dc in next ch 3 sp, ch 2, 1 tr in 2nd ch of starting ch 2 to form 6th ch 5 sp of Round.

Round 3: 1 sc over post of tr directly below, * ch 7, 1 sc in next ch 5 sp; repeat from * around 4 times, ch 3, 1 dtr in starting sc to form 6th ch 7 sp of Round.

Round 4: 1 sc over post of dtr directly below, * ch 11, 1 sc in next ch 11 sp; repeat from * around 5 times; sl st in starting sc.
If you're not reading this pattern on Snowcatcher, you're not reading the designer's blog. Please go here to see the original.

Round 5: * Sl st into next ch 11 sp, ch 10, sl st in 3rd ch from hook, 1 sc in next ch, 1 hdc in next ch, 1 dc in each of next 3 ch, 1 hdc in next ch, 1 sc in next ch (bushy tail made),

sk next ch 11 ch, sl st in ch 11 ch, ch 16, 1 sc in 3rd ch from hook, 1 dc in each of next 2 ch (ear made),

ch 7, sl st in 3rd ch from hook, 1 sc in next ch (snout made), ch 4, sl st in 3rd ch from hook, sl st in next ch (bottom of mouth made),

draw up loop through sc of snout to make linked dc, draw up loop through next ch, yo and draw through 2 loops on hook, [yo and draw up loop through next ch, yo and draw through 2 loops on hook] 2 times, yo and draw through all 4 loops on hook (dc dec and coyote head made),

work another dc dec in top and bottom of 2nd ear dc and next ch, 2 dc in same ch as 3rd dc of dc dec just made (throat shaped),

1 hdc and 1 dc in next ch, [yo 2 times and draw up loop through next ch, yo and draw through 2 loops on hook 2 times] 3 times, yo and draw through all 4 loops on hook (tr dec made),

1 tr in each of next 2 ch, yo 2 times and draw up loop through next ch, yo and draw through 2 loops on hook 2 times, [yo and draw up loop through next ch, yo and draw through 2 loops on hook] 3 times, yo and draw through all 5 loops on hook ( tr/dc dec made and body shaped), sk next ch 11 sp ch, sl st in next ch 11 sp ch,

sl st in each of next 3 ch 11 sp ch, ch 1, turn, 1 sc in each of next 2 sl st (foot made),

sk next tr/dc dec of coyote body, 1 sc in each of next 2 tr, draw up loop in next tr dec, yo and draw up loop through next dc dec, yo and draw through 2 loops on hook, yo and draw through 3 loops on hook (sc/dc dec made, chest shaped),

draw up loop through top of sc/dc dec just made, yo and draw through both loops on hook (foundation sc made), 3 fsc (front legs made),

sk next ch 11 sp ch, sl st in each of next 2 ch 11 sp ch;

repeat from * around 5 times; bind off. Weave in ends.

Finish: Tape wax paper or plastic wrap to top of empty pizza box. Pin snowflake to box on top of wax paper or plastic wrap.

If using glue, mix a few drops of water with a teaspoon of glue in small washable container. Paint snowflake with glue mixture or desired stiffener. Sprinkle lightly with glitter. Wash paintbrush and container thoroughly. Allow snowflake to dry at least 24 hours. Remove pins. Gently peel snowflake from wax paper or plastic wrap. Attach 10-inch clear thread to one spoke, weaving in end. Wrap fishing line around tree branch (or tape to ceiling or any overhead surface) and watch the snowflake twirl freely whenever you walk by! Snowflake also may be taped to window or tied to doorknob or cabinet handle.

02 December 2017

Light the World

I'm a day late, but that just means I have to double up today.

Related Posts with Thumbnails