Showing posts with label heartflake. Show all posts

09 April 2026

Woven Dreams


(affiliate links to my designs)

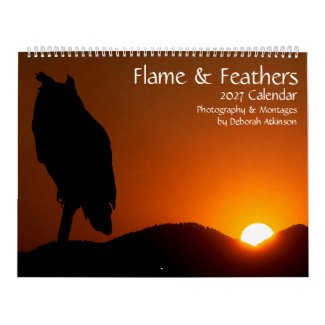
I've crocheted throws, I've designed polar fleece throws, and I've quilted cotton blankets. And, as I noted last week, I've yearned to learn to weave with my loom that has never come out of the box.

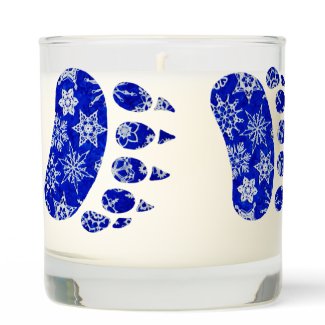
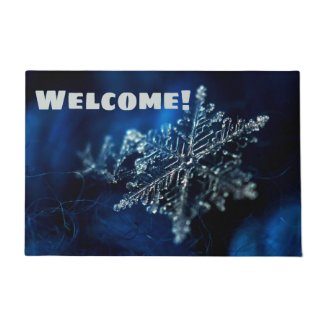
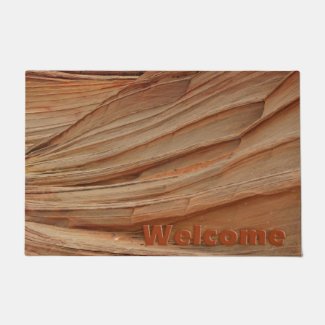
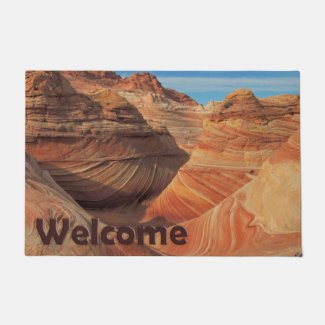
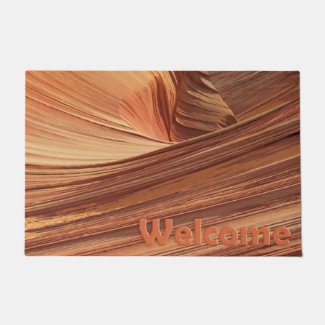
Woven throws supposedly are hot items these days. So I tried my hand at creating one. I love the design so much, I created different color variations, including Valentine's Day...

If I do a February version, I have to do a March version...

Spring colors were fun.

No special edition collection would be complete without a 250th anniversary variation!

And no sample blah blah blahg post would be complete without an AI caricature of me waving my patriotic colors in the breeze. (But just until my real life sample arrives! Can't wait!!!)

10 February 2025

Heartflake Monday

Our official Make a Snowflake Day snuck up on me last week. I apologize for not coming up with something special to celebrate. I apologize for not even making a snowflake that day. Hopefully, today's Valentine flake will spread some love and kindness, even though I've neglected my crochet snowflake duties.

Here's my inspiration for this week's skipped heartbeat. Click on the photo to be taken to the creator's post. There are several great heartflake papercuts with instructions!

You may do whatever you'd like with snowflakes you make from this pattern, but you may not sell or republish the pattern. Thanks, and enjoy!

Finished Size: 3.5 inches from point to point
Materials: Size 10 crochet thread, size 7 crochet hook, empty pizza box, wax paper or plastic wrap, cellophane tape, water soluble school glue or desired stiffener, water, glitter, small container for glue/water mixture, paintbrush, stick pins that won't be used later for sewing, clear thread or fishing line

Skipped Beat Heartflake Instructions

Ch 36. Taking care not to twist work, sl st into starting ch to form circle.

Round 1: [Ch 2, sk next 2 ch, 1 pc in next ch, ch 2, sk next 2 ch, sl st in next ch] 6 times.

Round 2: Ch 11 (counts as 1 dc and [ch 9), sk over next 2 ch, next pc and next 2 ch, 1 dc around next sl st] 5 times; ch 4, 1 trtr in 2nd ch of starting ch 11 to form 6th ch 9 tip of Round.

If you're not reading this pattern on Snowcatcher, you're not reading the designer's blog. Please go here to see the original.

Round 3: Ch 15 (counts as 1 dc and [ch 13), 1 dc in 3rd ch from hook and in each of next 2 ch, ch 4, 1 dc in 3rd ch from hook and in next ch, 1 dc in top half of next dc, 1 dc in bottom half of same dc, sl st in each of next 2 ch (heart picot made), ch 6, 1 dc in middle (5th) ch of next ch 9 tip] 5 times, omitting last dc of final repeat; sl st in 2nd ch of starting ch 13; bind off. Weave in ends.

NOTE: If you're having trouble with the heart picot, see the photo tutorial here. Although today's heart picot is just a bit different than in the tutorial, the technique is the same.

TIP: I use linked dc for my heart picots. I think it dramatically improves them because it eliminates gaps. Moogly has a great linked dc tutorial here.

Finish: I've been stiffening my flakes with undiluted, full-strength water soluble school glue for quite a while now, and I've been squishing the glue onto and throughout each flake with my fingers (yucky mess!!!) instead of gingerly painting the flakes with glue. Yes, it's a mess. But it's faster. And stiffer.

Tape wax paper or plastic wrap to top of empty pizza box. Pin snowflake to box on top of wax paper or plastic wrap.

If using glue, mix a few drops of water with a teaspoon of glue in small washable container. Paint snowflake with glue mixture or desired stiffener. Sprinkle lightly with glitter. Wash paintbrush and container thoroughly. Allow snowflake to dry at least 24 hours. Remove pins. Gently peel snowflake from wax paper or plastic wrap. Attach 10-inch clear thread to one spoke, weaving in end. Wrap fishing line around tree branch (or tape to ceiling or any overhead surface) and watch snowflake twirl freely whenever you walk by! Snowflake also may be taped to window or tied to doorknob or cabinet handle.

20 May 2024

Snowflake Monday

The inspiration for today's snowflake fell on my front porch on January 8 this year during Winter Storm Finn. I've been yearning to crochet it ever since because I see tiny little hearts in the photo! And you know how I love heartflakes!

You may do whatever you'd like with snowflakes you make from this pattern, but you may not sell or republish the pattern. Thanks, and enjoy!

Finished Size: 7.5 inches from point to point
Materials: Size 10 crochet thread, size 7 crochet hook, empty pizza box, wax paper or plastic wrap, cellophane tape, water soluble school glue or desired stiffener, water, glitter, small container for glue/water mixture, paintbrush, stick pins that won't be used later for sewing, clear thread or fishing line

Winter Storm Finn Snowflake Instructions

Make magic ring.

Round 1: Ch 4 (counts as 1 dtr), 23 dtr in ring; sl st in 4th ch of starting ch 4. Don't pull magic circle too tight.

Round 2: [Ch 7, sl st in 3rd ch from hook, 2 dtr in next dtr, ch 4, sl st in 4th ch from hook, 2 dtr in next dtr, ch 3, sl st in 3rd ch from hook, ch 4, sl st in each of next 2 dtr] 6 times, omitting last sl st of final repeat.
NOTE: Binding off here makes a super cute little snowflake!

Round 3: Ch 25 (counts as 1 quadtr (or yo 5 times) and [ch 19), 1 sc in 3rd ch from hook, [sk next ch, 1 sc in next ch] 5 times], ch 6, 1 quadtr (or yo 5 times) in next gap between spokes] 6 times, omitting last quadtr of final repeat; sl st in 6th ch of starting ch 25.
If you're not reading this pattern on Snowcatcher, you're not reading the designer's blog. Please go here to see the original.

Round 4: [1 sc in each of next 6 ch, working up spoke, sk next sc, 1 sc in next ch 1 sp, 1 sc in bottom of next sc, [1 sc in next ch 1 sp, ch 1, 1 sc in next ch 1 sp] 3 times, in spoke tip work (2 sc, ch 1, 2 sc), working back down spoke, [1 sc in next ch 1 sp, ch 1, 1 sc in next ch 1 sp] 3 times, 1 sc in top of next sc, 1 sc in next ch 1 sp, sk next sc, 1 sc in each of next 6 ch; sl st in starting sc; bind off. Weave in ends.

Winter Storm Finn Snowflake Rock Instructions

This pattern was created from the first two-round snowflake prototype I made using the above photo as inspiration. I like this flake, too, but I like the above flake better! However, a few modifications make this a cute snowflake rock for the garden, don't you think?

Make magic ring.

Round 1: Ch 2 (counts as 1 dc), 17 dc in ring. Don't pull magic circle too tight.

Round 2: [Ch 7, sl st in 3rd ch from hook, 2 dtr in next dc, ch 4, sl st in 4th ch from hook, 2 dtr in next dc, * ch 3, sl st in 3rd ch from hook, ch 2, sl st in next dc] 6 times, ending * on final repeat; 1 dtr in next dc, ch 1, 1 hdc in top of dtr just made to form 12th ch 3 picot of Round.
If you're not reading this pattern on Snowcatcher, you're not reading the designer's blog. Please go here to see the original.

Round 3: Ch 5 (counts as 1 dc and [ch 3, 1 dc in next ch 3 picot, ch 3, 1 sc in next ch 4 picot, [ch 3, 1 dc in next ch 3 picot] 2 times) 6 times, omitting last dc and last 2 ch of final repeat; 1 dc in 2nd ch of starting ch 5 to form 18th ch 3 sp of Round.

Round 4: Ch 7 (counts as 1 dc and [ch 5), 1 dc in next ch 5 loop] 17 times; 1 tr in 2nd ch of starting ch 7 to form 18th ch 5 sp of Round.

Rounds 5-?: Ch 7 (counts as 1 dc and ch 5), [1 dc in next ch 5 sp, ch 5] 16 times; 1 dc in next ch 5 sp, ch 2, 1 tr in 2nd ch of starting ch 7 to form 18th ch 5 sp of Round. Continue with Round 5 until snowflake fits snugly around rock, leaving about a 1- to 2-inch opening on the back or bottom side.

Final Round, Rock Covering:Ch 2 (counts as 1 dc), 1 dc in each ch 5 sp around, inserting rock after about 2/3rds of Round, gently stitching while finishing Round and closing up hole so as not to damage crochet hook; sl st in 2nd ch of starting ch 2; bind off, leaving 4- to 5-inch tail. Weave end through final Round of dc and pull tight. Bind off again, weave in end. Place in garden!

Snowflake Finish: I've been stiffening my flakes with undiluted, full-strength water soluble school glue for quite a while now, and I've been squishing the glue onto and throughout each flake with my fingers (yucky mess!!!) instead of gingerly painting the flakes with glue. Yes, it's a mess. But it's faster. And stiffer.

Tape wax paper or plastic wrap to top of empty pizza box. Pin snowflake to box on top of wax paper or plastic wrap.

If using glue, mix a few drops of water with a teaspoon of glue in small washable container. Paint snowflake with glue mixture or desired stiffener. Sprinkle lightly with glitter. Wash paintbrush and container thoroughly. Allow snowflake to dry at least 24 hours. Remove pins. Gently peel snowflake from wax paper or plastic wrap. Attach 10-inch clear thread to one spoke, weaving in end. Wrap fishing line around tree branch (or tape to ceiling or any overhead surface) and watch snowflake twirl freely whenever you walk by! Snowflake also may be taped to window or tied to doorknob or cabinet handle.

07 March 2022

Snowflake Monday

I couldn't sleep Friday night, so I got up and made a new snowflake. When Lizard saw it Saturday morning, he said it looks very complicated. That it was! I don't remember how many times I had to frog sections and do them over and over, but it seemed I had a mountain of curly thread on my lap almost throughout.

It's a good thing we had chilly, windy and eventually snowy weather over the weekend, or I wouldn't have been able to finish writing the pattern. You'd have just a photo of the flake today with no instructions!

As I was preparing to spend a week with my mother-in-law last month, I was digging around in my project bags (Yes, sadly, I have more than one. More than 10. Probably closer to 20.) trying to decide what to take with me when I came across my stash of hand-dyed thread. I had forgotten how many luscious colors I have, and I couldn't wait to dive into them again!!!

This week's pattern allowed me to get back into my glorious pinks.

Today's pattern also allowed me to show different ways to pin the same snowflake.

You may do whatever you'd like with snowflakes you make from this pattern, but you may not sell or republish the pattern. Thanks, and enjoy!

Finished Size: 6.5 inches from point to point
Materials: Size 10 crochet thread, size 7 crochet hook, empty pizza box, wax paper or plastic wrap, cellophane tape, water soluble school glue or desired stiffener, water, glitter, small container for glue/water mixture, paintbrush, stick pins that won't be used later for sewing, clear thread or fishing line

Svoboda Snowflake Instructions

If working heart motif in white, ch 14 and work each of next 7 rows in white and do not bind off. If working heart motif in one color, different than flake, ch 14 in that color and work each of next 7 rows in that color, binding off as instructed at end of Row 7. If working motif in 2 colors, ch 14 with top half of heart color.

Row 1 of heart motif: 1 sc in 2nd ch from hook and in each of next 12 ch for a total of 13 sc; ch 1, turn.

NOTE: This second row is another of my infamous rows/rounds that probably will give you fits, and for that, I apologize. Experience with linked crochet will help tremendously. I played around with linking more than just the first and last tr of each shell in order to prevent gaps in the stitches, but the motif doesn't look bad without all the linking. If my instructions don't make sense to you, just work a regular 7-tr shell instead of linking the stitches.
Row 2: [Draw up a loop through each of the next 3 sc, [[yo and draw up loop through 2 loops on hook]] 3 times (linked tr made), 5 tr in same sc as 3rd drawn-up loop, yo 2 times, draw up loop through same sc, [[draw up loop through next sc and through 2 loops on hook]] 3 times (linked tr made), sl st in next sc] 2 times, omitting last sl st of final repeat. If working motif entirely in white or red (or desired color), sl st into 13th sc of 1st Row, then sl st into foundation ch of 13th sc and ch 1 to begin next Row. If working heart in 2 colors, bind off here and weave in end.

linking tr

Row 3: If working heart motif in 2 colors, using 2nd color, 1 sc in each of 13 foundation ch across bottom edge of heart motif. Ch 1, turn. If using 1 color for heart motif, 1 sc in each of 13 foundation ch across bottom edge of heart motif. Ch 1, turn.
If you're not reading this pattern on Snowcatcher, you're not reading the designer's blog. Please go here to see the original.

Row 4: Work sc dec across next 3 sc, 1 sc in each of next 7 sc, sc dec across next 3 sc; ch 1, turn.

Row 5: Sc dec across next 3 sc, 1 sc in each of next 3 sc, sc dec across next 3 sc; ch 1, turn.

Row 6: Sc dec across next 2 sc, 1 sc in next sc, sc dec across next 2 sc; ch 1, turn.

Row 7: Sc dec across next 3 sc. If working heart motif in different color than flake, bind off here and weave in end. If working heart motif in same color as flake, ch 5 and begin Round 8 at *.

Round 8: If working heart motif in different color than flake, using flake color, 1 dc in bottom tip of heart motif, ch 3, * work [[1 dc and ch 3 up side of heart]] 5 times evenly spaced to near top of heart, 1 dc in next tr, ch 3, 1 tr in sl st between tr shells, ch 3, 1 dc in top of next tr shell, ch 3, 1 dc in next tr, work [[ch 3, 1 dc down side of heart]] 4 times evenly spaced to near bottom of heart, ch 3, 1 dc in tip of heart, ch 1, 1 dc in 2nd ch of starting ch 5 or starting dc, whichever applies, for a total of 15 ch 3 sp.

Round 9: Ch 2 (counts as 1 dc), 2 dc over post of dc directly below, 3 dc in each of next 2 ch 3 sp, ch 3, 3 dc in each of next 3 ch 3 sp, ch 3, 3 dc in next ch 3 sp, 3 tr in next ch 3 sp, ch 3, 3 tr in next ch 3 sp, 3 dc in next ch 3 sp, [ch 3, 3 dc in each of next 3 ch 3 sp]] 2 times, ch 1, 1 dc in 2nd ch of starting ch 2.

Round 10: Ch 12 (counts as 1 dc and [ch 10), 1 dc in next ch 3 sp, ch 3, 1 dc in same sp] 5 times; ch 10, 1 dc in next ch 3 sp, ch 1, 1 dc in 2nd ch of starting ch 12.

Round 11: Ch 5 (counts as 1 dc and ch 3), 1 dc over post of dc directly below, [ch 5, 1 sc tightly in center of next ch 10 sp, ch 5, in next ch 3 sp work (1 dc, ch 3, 1 dc, ch 5, 1 dc, ch 3)] 5 times; ch 5, 1 sc tightly in center of next ch 10 sp, ch 5, in next ch 3 sp work (1 dc, ch 3, 1 dc, ch 1), 1 dc in 2nd ch of starting ch 5.

Round 12: Ch 5 (counts as 1 dc and ch 3), 1 dc over post of dc directly below, [in next ch 3 sp work (1 dc, ch 3, 1 dc), ch 3, in next sc work (1 sc, ch 15, 1 sc), ch 3, in next ch 3 sp work (1 dc, ch 3, 1 dc), in next ch 5 sp work (1 dc, ch 3, 1 dc, ch 5*, 1 dc, ch 3, 1 dc)] 6 times, ending * on final repeat; sl st in 2nd ch of starting ch 5; bind off. Weave in ends.

Finish: Tape wax paper or plastic wrap to top of empty pizza box. Pin snowflake to box on top of wax paper or plastic wrap.

If using glue, mix a few drops of water with a teaspoon of glue in small washable container. Paint snowflake with glue mixture or desired stiffener. Sprinkle lightly with glitter. Wash paintbrush and container thoroughly. Allow snowflake to dry at least 24 hours. Remove pins. Gently peel snowflake from wax paper or plastic wrap. Attach 10-inch clear thread to one spoke, weaving in end. Wrap fishing line around tree branch (or tape to ceiling or any overhead surface) and watch snowflake twirl freely whenever you walk by! Snowflake also may be taped to window or tied to doorknob or cabinet handle.

31 January 2022

Snowflake Monday

I was trying to come up with another easy little heartflake when I realized I could make this one bigger. So you get a bonus pattern today!

I also enjoyed playing with photos of my new heartflakes while listening to Led Zepplin.

to my love

You may do whatever you'd like with snowflakes you make from this pattern, but you may not sell or republish the pattern. Thanks, and enjoy!

Finished Size: 3 and 9 inches from point to point
Materials: Size 10 crochet thread, size 7 crochet hook, empty pizza box, wax paper or plastic wrap, cellophane tape, water soluble school glue or desired stiffener, water, glitter, small container for glue/water mixture, paintbrush, stick pins that won't be used later for sewing, clear thread or fishing line

All of My Loveflake Instructions

Make magic ring.

Round 1: Ch 2 (counts as 1 dc), 2 dc in ring, [ch 1, 3 dc in ring] 5 times; 1 hdc in 2nd ch of starting ch 2 to form 6th ch 1 point of Round. Don't pull magic circle too tight.
If you're not reading this pattern on Snowcatcher, you're not reading the designer's blog. Please go here to see the original.

Round 2: Ch 2 (counts as 1 dc), [in next ch 1 sp work 2 dc, ch 12, 1 dc in 3rd ch from hook, 1 ldc in each of next 2 ch, ch 4, 1 dc in 3rd ch from hook, 1 ldc in next ch, 1 lhdc in top of next dc, 1 sc in bottom of same dc, sl st in next ch, ch 5, 2 dc] 6 times, omitting last 2 dc of final repeat; sl st in 2nd ch of starting ch 2; bind off. Weave in ends.

Whole Lotta Loveflake Instructions

Make magic ring.

Round 1: Ch 2 (counts as 1 dc), 2 dc in ring, [ch 1, 3 dc in ring] 5 times; 1 hdc in 2nd ch of starting ch 2 to form 6th ch 1 point of Round. Don't pull magic circle too tight.
If you're not reading this pattern on Snowcatcher, you're not reading the designer's blog. Please go here to see the original.

Round 2: Ch 2 (counts as 1 dc), [2 dc n next ch 1 sp, ch 12, 1 dc in 3rd ch from hook, 1 ldc in each of next 2 ch, [[ch 14, 1 dc in 3rd ch from hook, 1 ldc in each of next 2 ch]] 2 times, ch 4, 1 dc in 3rd ch from hook, 1 ldc in next ch, 1 lhdc in top of next dc, 1 sc in bottom of same dc, sl st in next ch, [[[ch 8, sk next 8 ch, sl st in top of next dc, ch 4, 1 dc in 2nd ch from hook, 1 ldc in next ch, 1 lhdc in top of next dc, 1 sc in bottom of same dc, sl st in next ch]]] 2 times, ch 6, 2 dc in same ch 1 sp] 6 times, omitting last 2 dc of final repeat; sl st in 2nd ch of starting ch 2; bind off. Weave in ends.

Finish: Tape wax paper or plastic wrap to top of empty pizza box. Pin snowflake to box on top of wax paper or plastic wrap.

If using glue, mix a few drops of water with a teaspoon of glue in small washable container. Paint snowflake with glue mixture or desired stiffener. Sprinkle lightly with glitter. Wash paintbrush and container thoroughly. Allow snowflake to dry at least 24 hours. Remove pins. Gently peel snowflake from wax paper or plastic wrap. Attach 10-inch clear thread to one spoke, weaving in end. Wrap fishing line around tree branch (or tape to ceiling or any overhead surface) and watch snowflake twirl freely whenever you walk by! Snowflake also may be taped to window or tied to doorknob or cabinet handle.

17 January 2022

Snowflake Monday

It's not even February yet, and I'm obsessed with heartflakes!

I recently stopped in Michael's, a craft chain, for the first time in more than two years. Oh, was I in heaven!!! I was out of glow-in-the-dark glue, and my local grocery store was, too. As you may guess, I came out with more than just a couple of bottles of glue!

I've been excited about glitter glues in the past, and I've been disappointed with the final results. I think this little bottle almost qualifies for another disappointment, but perhaps I can squeeze in time to make just one more flake and apply both the glitter glue AND the new blue glitter...

You may do whatever you'd like with snowflakes you make from this pattern, but you may not sell or republish the pattern. Thanks, and enjoy!

Finished Size: 5 inches from point to point
Materials: Size 10 crochet thread, size 7 crochet hook, empty pizza box, wax paper or plastic wrap, cellophane tape, water soluble school glue or desired stiffener, water, glitter, small container for glue/water mixture, paintbrush, stick pins that won't be used later for sewing, clear thread or fishing line

SPECIAL STITCHES:

Popcorn Stitch (pc)

Work 5 dc in designated st, take loop off hook, insert hook through top loop of 1st dc and replace loop on hook, pull loop through top of 1st dc.

Chained Heart Snowflake Instructions

Make magic ring.

Round 1: [1 pc in ring, ch 8], 6 times, omitting last 4 ch of final repeat; 1 dtr in starting pc to form 6th ch 8 point of Round. Pull magic circle tight.

Round 2: Ch 2 (counts as 1 dc), 4 dc over post of dtr directly below, [in next ch 8 tip work 5 dc, ch 3, 5 dc] 5 times; 5 dc in next ch 8 tip, ch 1, 1 dc in 2nd ch of starting ch 2 to form 6th ch 3 tip of Round.

Round 3: Ch 10 (counts as 1 dc and [ch 8, 1 dc in next ch 3 tip, ch 3, 1 dc in same tip] 5 times; ch 8, 1 dc in next ch 3 tip, ch 1, 1 dc in 2nd ch of starting ch 10 to form 6th ch 3 tip of Round.
If you're not reading this pattern on Snowcatcher, you're not reading the designer's blog. Please go here to see the original.

Round 4: Ch 18 (counts as 1 dc and [ch 16), 1 dc in next ch 3 tip] 6 times, omitting last dc of final repeat; sl st in 2nd ch of starting ch 18; bind off. Weave in ends.

Finish: Tape wax paper or plastic wrap to top of empty pizza box. Pin snowflake to box on top of wax paper or plastic wrap.

If using glue, mix a few drops of water with a teaspoon of glue in small washable container. Paint snowflake with glue mixture or desired stiffener. Sprinkle lightly with glitter. Wash paintbrush and container thoroughly. Allow snowflake to dry at least 24 hours. Remove pins. Gently peel snowflake from wax paper or plastic wrap. Attach 10-inch clear thread to one spoke, weaving in end. Wrap fishing line around tree branch (or tape to ceiling or any overhead surface) and watch snowflake twirl freely whenever you walk by! Snowflake also may be taped to window or tied to doorknob or cabinet handle.

Related Posts with Thumbnails