Every once in a while, I come up with a snowflake design that really tickles my fancy, and I want to make 100 of them. Sometimes, I want to make 100 variations. Perhaps today's flake could be better named my Century III Snowflake! (And I would call it that if I had time to make 96 more!!!)

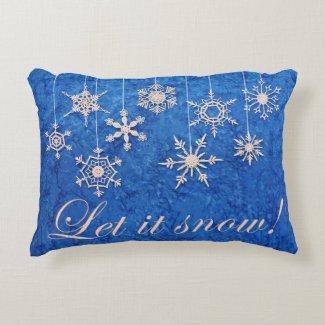
Today's pattern is my favorite of all the snowflakes inspired by a pillow I received for Christmas in 2020.

My first design from this snowflake had open points, and I like it that way. Yet the temptation to fill those little openings with my hand-dyed thread was overpowering! I have enough hand-dyed thread colors, I could keep making this baby for the rest of the year and still never run out of hand-dyed thread. Or maybe even ideas...

So I think today's bonus pattern is the most perfect way to celebrate today… our sixth annual Snowflake Day or Make a Snowflake Day. Thank you to Snowflake Sister Autumn for having this holiday officially recognized back in 2015. Let's keep it alive this year by staging yet another virtual Snowflake Ball!

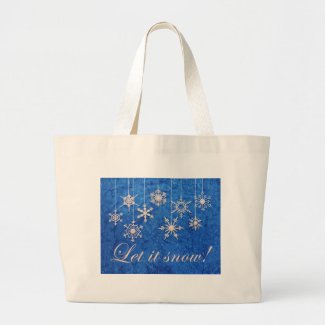
I've been designing snowflakes from the Christmas gift pillow all year, and I wondered if I could improve upon the pillow. I photographed some of my favorite flakes, then played with Photoshop (of course, because that's yet another of my addictions), then created some fun stuff with the design.

And with that Spoonflower fabric I designed, I plan to make a much better pillow! The decorative pillow covering will be made of fleece, and it will be twice the size of the tiny little gift pillow. Plus, it will be blue!
I planned to show off photos of my new pillow today, but the Spoonflower fabric shipped yesterday. (I ordered it in mid-January!) Everything takes a little longer these days. But good things are worth waiting for. I'll share the pillow in an upcoming Snowflake Monday blog post, and perhaps this will motivate me to come up with one more crocheted snowflake interpretation from the original pillow. (There's one more special flake from the pillow coming up next Monday!!!)
So now I have this hole in my blog post below where I planned to show off the new pillow. Instead I'll share some of the snowflake treats I made yesterday when I discovered the pillow fabric won't be here in time for today. Snowflakes are snowflakes, no matter the form, right?!?

The healthy ginger cookies are delicious, but they didn't come out of the snowflake mold cookie sheet, darn it. The rich white chocolate and salted caramel hot chocolate bombs are the bomb! They turned out super awesome, and they taste great, too!

You may do whatever you'd like with snowflakes you make from this pattern, but you may not sell or republish the pattern. Thanks, and enjoy!

Finished Size: 5.5 inches from point to point
Materials: Size 10 crochet thread in at least two colors, size 7 crochet hook, empty pizza box, wax paper or plastic wrap, cellophane tape, water soluble school glue or desired stiffener, water, glitter, small container for glue/water mixture, paintbrush, stick pins that won't be used later for sewing, clear thread or fishing line
Let It Snowflake IIIb Instructions
TIP: This snowflake has a lot of ends to weave in. If the snowflake will be stiffened, ends may be pulled under just a couple of stitches, then clipped when snowflake is dry. Stiffened snowflake thread ends should not unravel.
Small Motif (make 6)
Make magic ring. 9 sc in ring, sl st starting sc; bind off. Pull magic ring tight. Weave in ends.
Medium Motif (make 6)
Make magic ring. 12 sc in ring; sl st in starting sc; bind off. Pull magic ring tight. Weave in ends.
Large Motif (make 6)
Make magic ring. Ch 2 (counts as 1 dc); 11 dc in ring; sl st in 2nd ch of starting ch 2; bind off. Pull magic ring tight. Weave in ends.
Plain Center Snowflake
With contrasting thread, make 12 motifs (above) in two sizes. With white thread, make magic ring.
Round 1: Ch 2 (counts as 1 dc), 11 dc in ring; sl st in 2nd ch of starting ch 2. Pull magic circle tight.
Round 2: Ch 2 (counts as 1 dc), 1 dc in same ch as sl st, 2 dc in each of next 11 dc; sl st in 2nd ch of starting ch 2.
If you're not reading this pattern on Snowcatcher, you're not reading the designer's blog. Please go here to see the original.
Round 3: Ch 11 (counts as 1 sc and [ch 10), 1 sc in any st of medium or large motif, [[1 sc in each of next 2 st, 3 sc in next st]] 3 times, 1 sc in each of next 3 st, working back down post, 1 sc in each of next 10 ch, 1 sc in each of next 2 dc of flake body, ch 5, 1 sc in any st of small motif, 1 sc in next st, [[3 sc in next st, 1 sc in next sc]] 3 times, 1 sc in each of next 2 sc, working back down post, sl st in each of next 5 ch, 1 sc in each of next 2 dc of flake body] 6 times, omitting last sc of final repeat; sl st in starting sc; bind off. Weave in ends.

Decorative Center Snowflake
Decorative Round 2: With contrasting thread, 1 fpdc around any Round 1 dc, [ch 2, sk next dc, 1 fp dc around next dc] 6 times, omitting last fpdc of final repeat; sl st in starting fpdc; bind off.
Decorative Round 3: Ch 2 (does not count as dc), 4 dc in each skipped Round 1 dc, taking care to catch Round 3 ch 2 sp in stitches to hide them, for a total of 24 dc; sl st in starting dc (skipping over ch 2 start). Weave Decorative Round 2 contrast threads into these stitches from behind to make sure they do not show on the front of the flake. If you're not reading this pattern on Snowcatcher, you're not reading the designer's blog. Please go here to see the original.
Decorative Round 4: Ch 11 (counts as 1 sc and [ch 10), 1 sc in any st of medium or large motif, [[1 sc in each of next 2 st, 3 sc in next st]] 3 times, 1 sc in each of next 3 st, working back down post, 1 sc in each of next 10 ch, 1 sc in each of next 2 dc of flake body, ch 5, 1 sc in any st of small motif, 1 sc in next st, [[3 sc in next st, 1 sc in next sc]] 3 times, 1 sc in each of next 2 sc, working back down post, sl st in each of next 5 ch, 1 sc in each of next 2 dc of flake body] 6 times, omitting last sc of final repeat; sl st in starting sc; bind off. Weave in ends.
Finish: Tape wax paper or plastic wrap to top of empty pizza box. Pin snowflake to box on top of wax paper or plastic wrap.
If using glue, mix a few drops of water with a teaspoon of glue in small washable container. Paint snowflake with glue mixture or desired stiffener. Sprinkle lightly with glitter. Wash paintbrush and container thoroughly. Allow snowflake to dry at least 24 hours. Remove pins. Gently peel snowflake from wax paper or plastic wrap. Attach 10-inch clear thread to one spoke, weaving in end. Wrap fishing line around tree branch (or tape to ceiling or any overhead surface) and watch snowflake twirl freely whenever you walk by! Snowflake also may be taped to window or tied to doorknob or cabinet handle.


No wonder you want to make a hundred of these - they're so whimsical and fun!
ReplyDeleteEnjoy that fabric when it comes.
I've never heard of a hot chocolate bomb, but they look and sound delicious!
(I tried and tried to leave this comment via my tablet and it just wouldn't take. On the computer now and hoping it works....)